Publishing Scenes to WordPress
Link scenes to page elements, size their containers, and publish — how a Volux document becomes a live 3D page.
Publishing turns an edited document into a page visitors can load. Each scene in the document renders as its own 3D canvas on the public page — but only where you point it. This page covers the binding that places a scene inside your page, the container options that size it, and what actually ships to WordPress when you click publish.
How publishing ships a scene
Click PUBLISH (or the update icon on an already-published document) and WordPress saves the document the way Volux renders it: one [volux_scene id="…"] marker per scene, appended to the post's content.
The shortcode is a marker, not a renderer
WordPress never draws the scene from the shortcode — no server-side markup is emitted for it. The shortcode keeps each scene discoverable in your post's content; the page's JavaScript owns the mount node and portals every scene into the page element it is linked to.
That means placing a scene is not about pasting shortcodes into the editor. You link each scene to a real element on the page, and the frontend does the rest.
Link a scene to an element
A scene without a link has nowhere to render: an unlinked scene never appears on the public site.
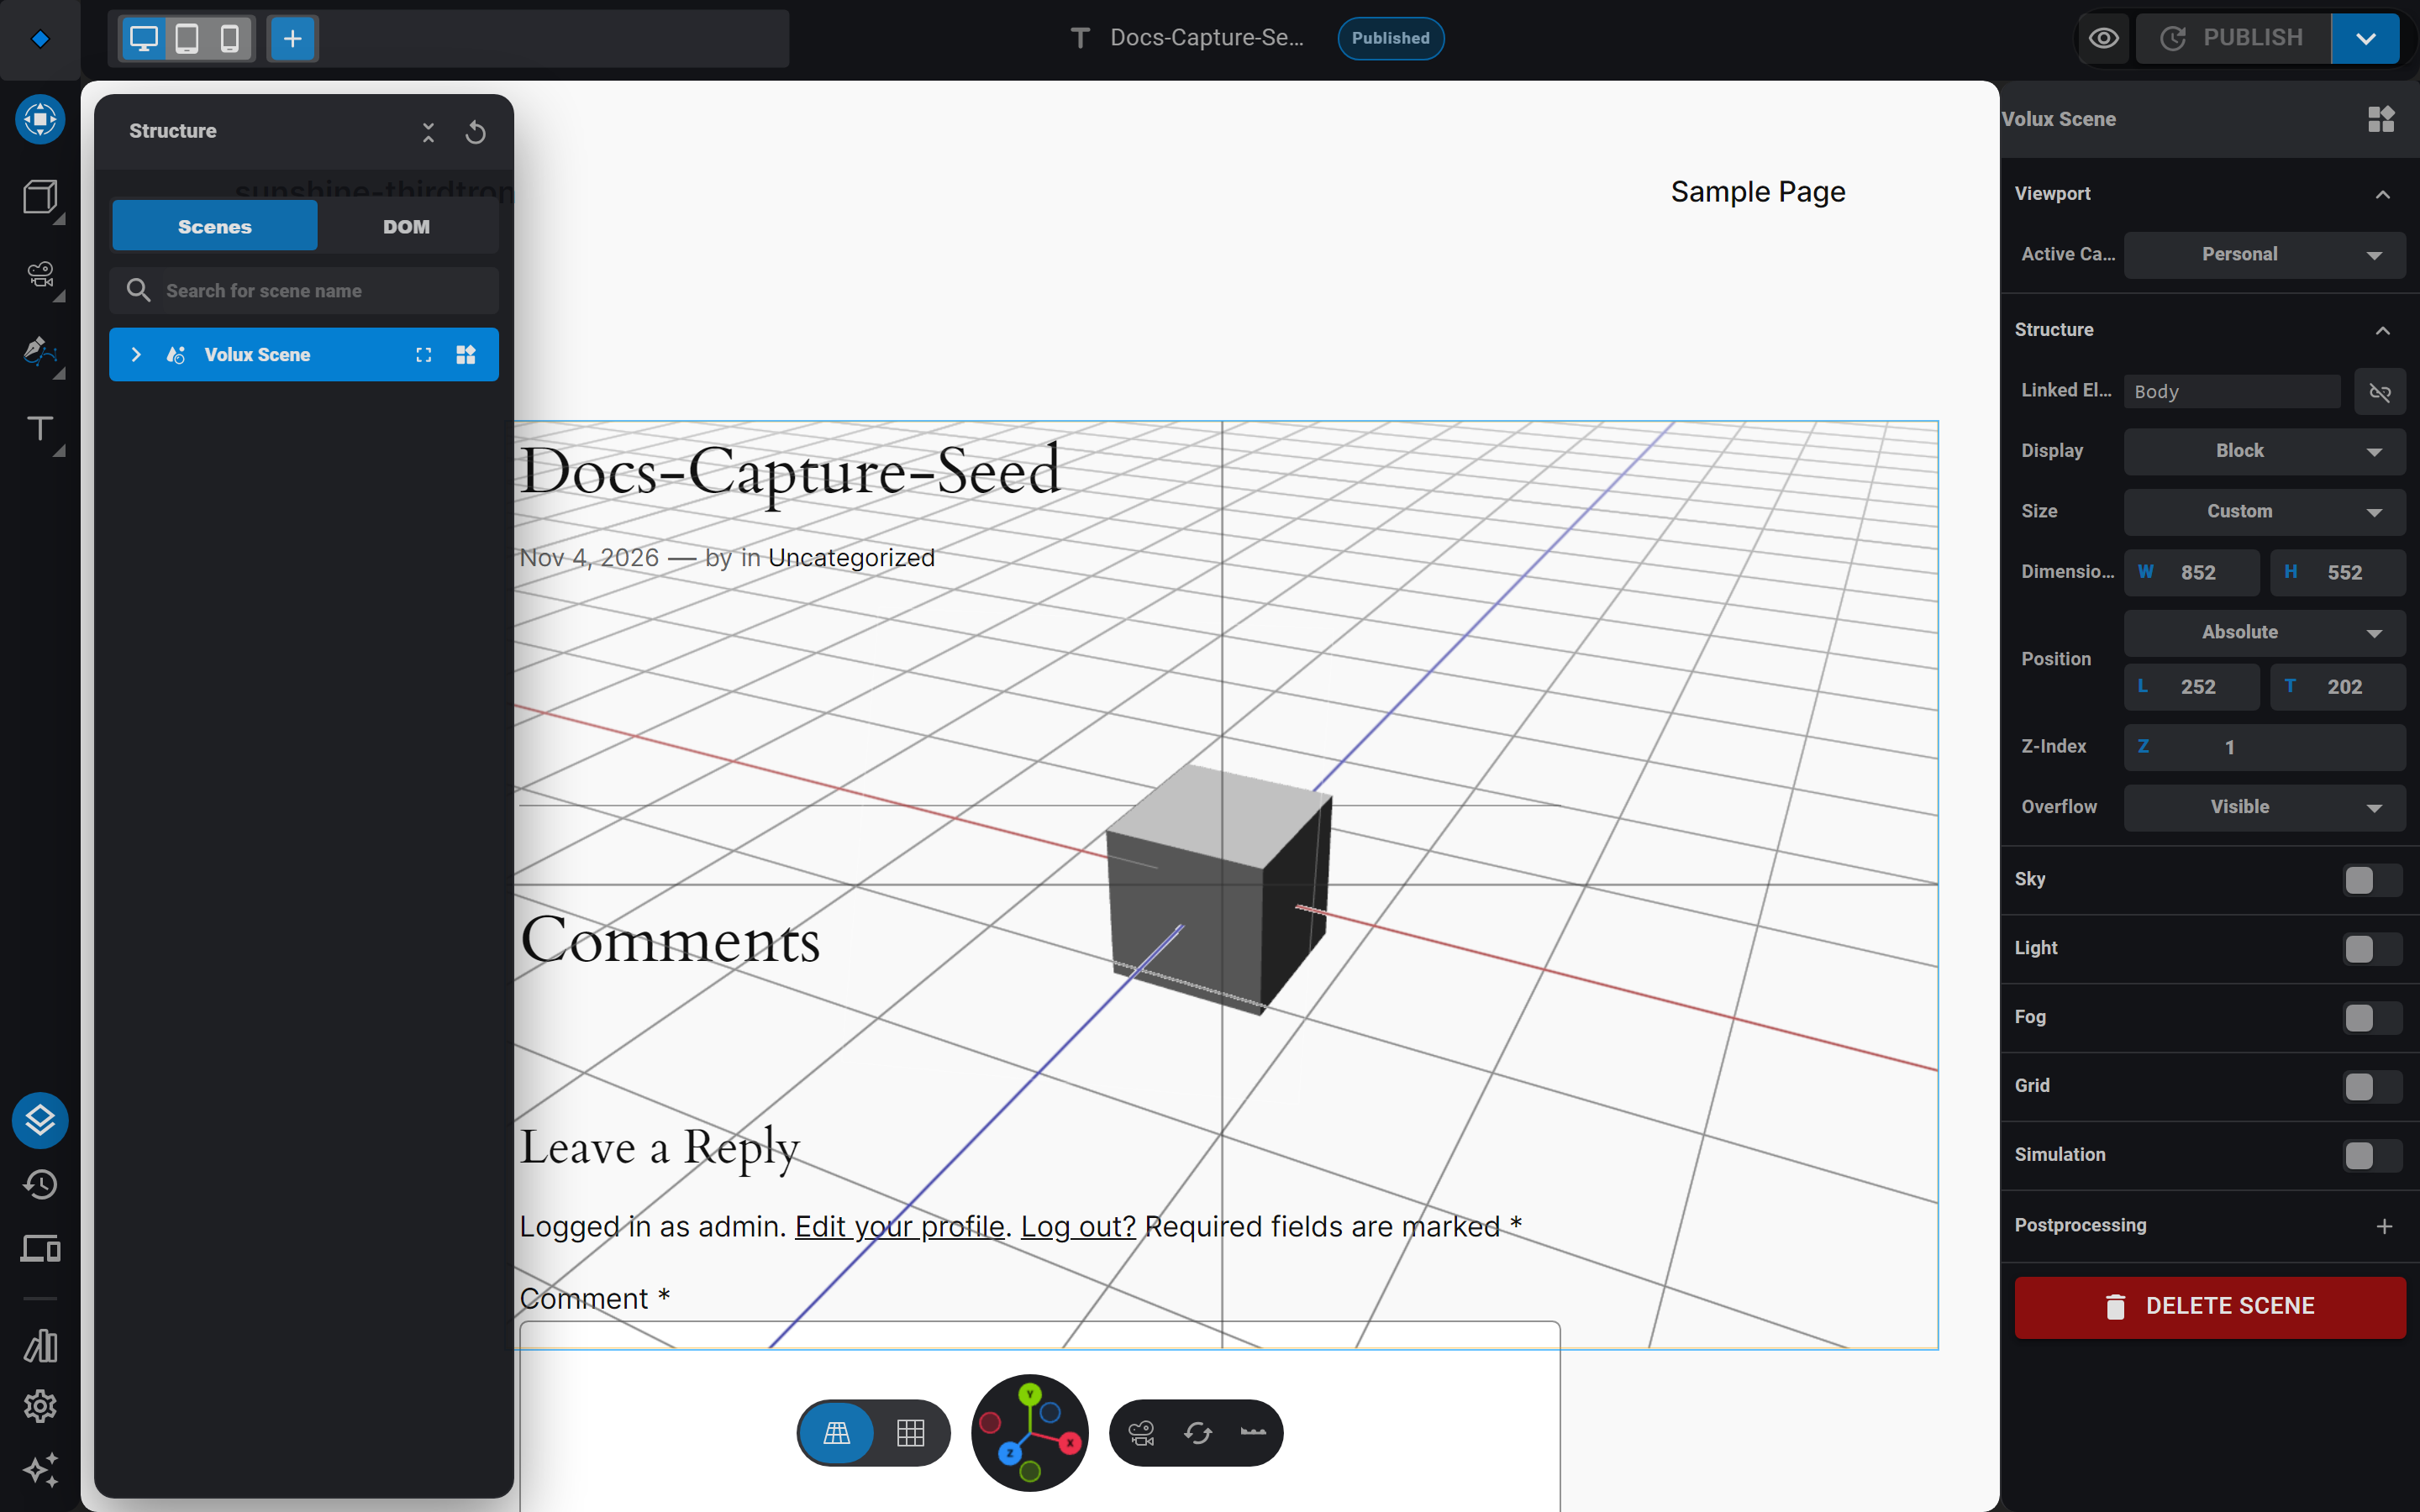
- Select the scene in the Structure drawer and open its Structure section — the Linked Element row shows what it renders into (No element linked until you pick one).
- Click the pick button at the row's right end, then hover the preview: page elements highlight. Click one to link it. You can also drag the scene row onto an element row in the DOM tree.
- To undo the binding, click the unlink icon on the same row.
Choose the placement
The link can put the scene inside the element or beside it:
- Inside (parent) — the scene renders within the element's box, like a hero background inside a section.
- Before / After — the frontend inserts a dedicated scene container as a sibling of the element. A sibling scene sizes itself from the element's parent, so it flows with the page layout.
Scenes never nest inside other scenes — the editor refuses a link target that already hosts one.
Size and place the container
The scene panel's Structure section holds the container controls:
- Size — Full Size, Full Width, Full Height, or Custom with explicit width and height. Full axes follow the linked element's box; siblings follow the element's parent.
- Position — static, relative, absolute, fixed, or sticky, mirroring CSS positioning. Offset fields appear for the positioned modes.
- Display and Overflow — show or hide the container, and clip, scroll, or spill its contents.
Zero height renders nothing
The 3D canvas paints inside the container's box. A container that resolves to zero height — a custom size of 0, or an auto-height element with no content — clips the entire scene away and the area looks blank. Give the container real height, or size from an element that has it. When a scene linked to body needs a full-height axis, Volux switches that axis to viewport units because the body's percentage heights collapse.
What renders on the page
When a visitor loads the page, the frontend reads the saved document and renders every scene it can place:
- Each scene portals into its linked element (or the sibling container beside it) and renders through that scene's default camera.
- Elements added to the page after load — by themes, plugins, or AJAX — are picked up too; the frontend watches the DOM for newly added link targets.
- A scene whose link can't be resolved is skipped, and a note is written to the browser console naming the scene and the missing element. The page's other scenes still render.
The editor flags the broken binding before you ship: the scene panel shows a Broken link warning when the linked element no longer exists, and the editor toasts every link it fails to resolve.
Publish options
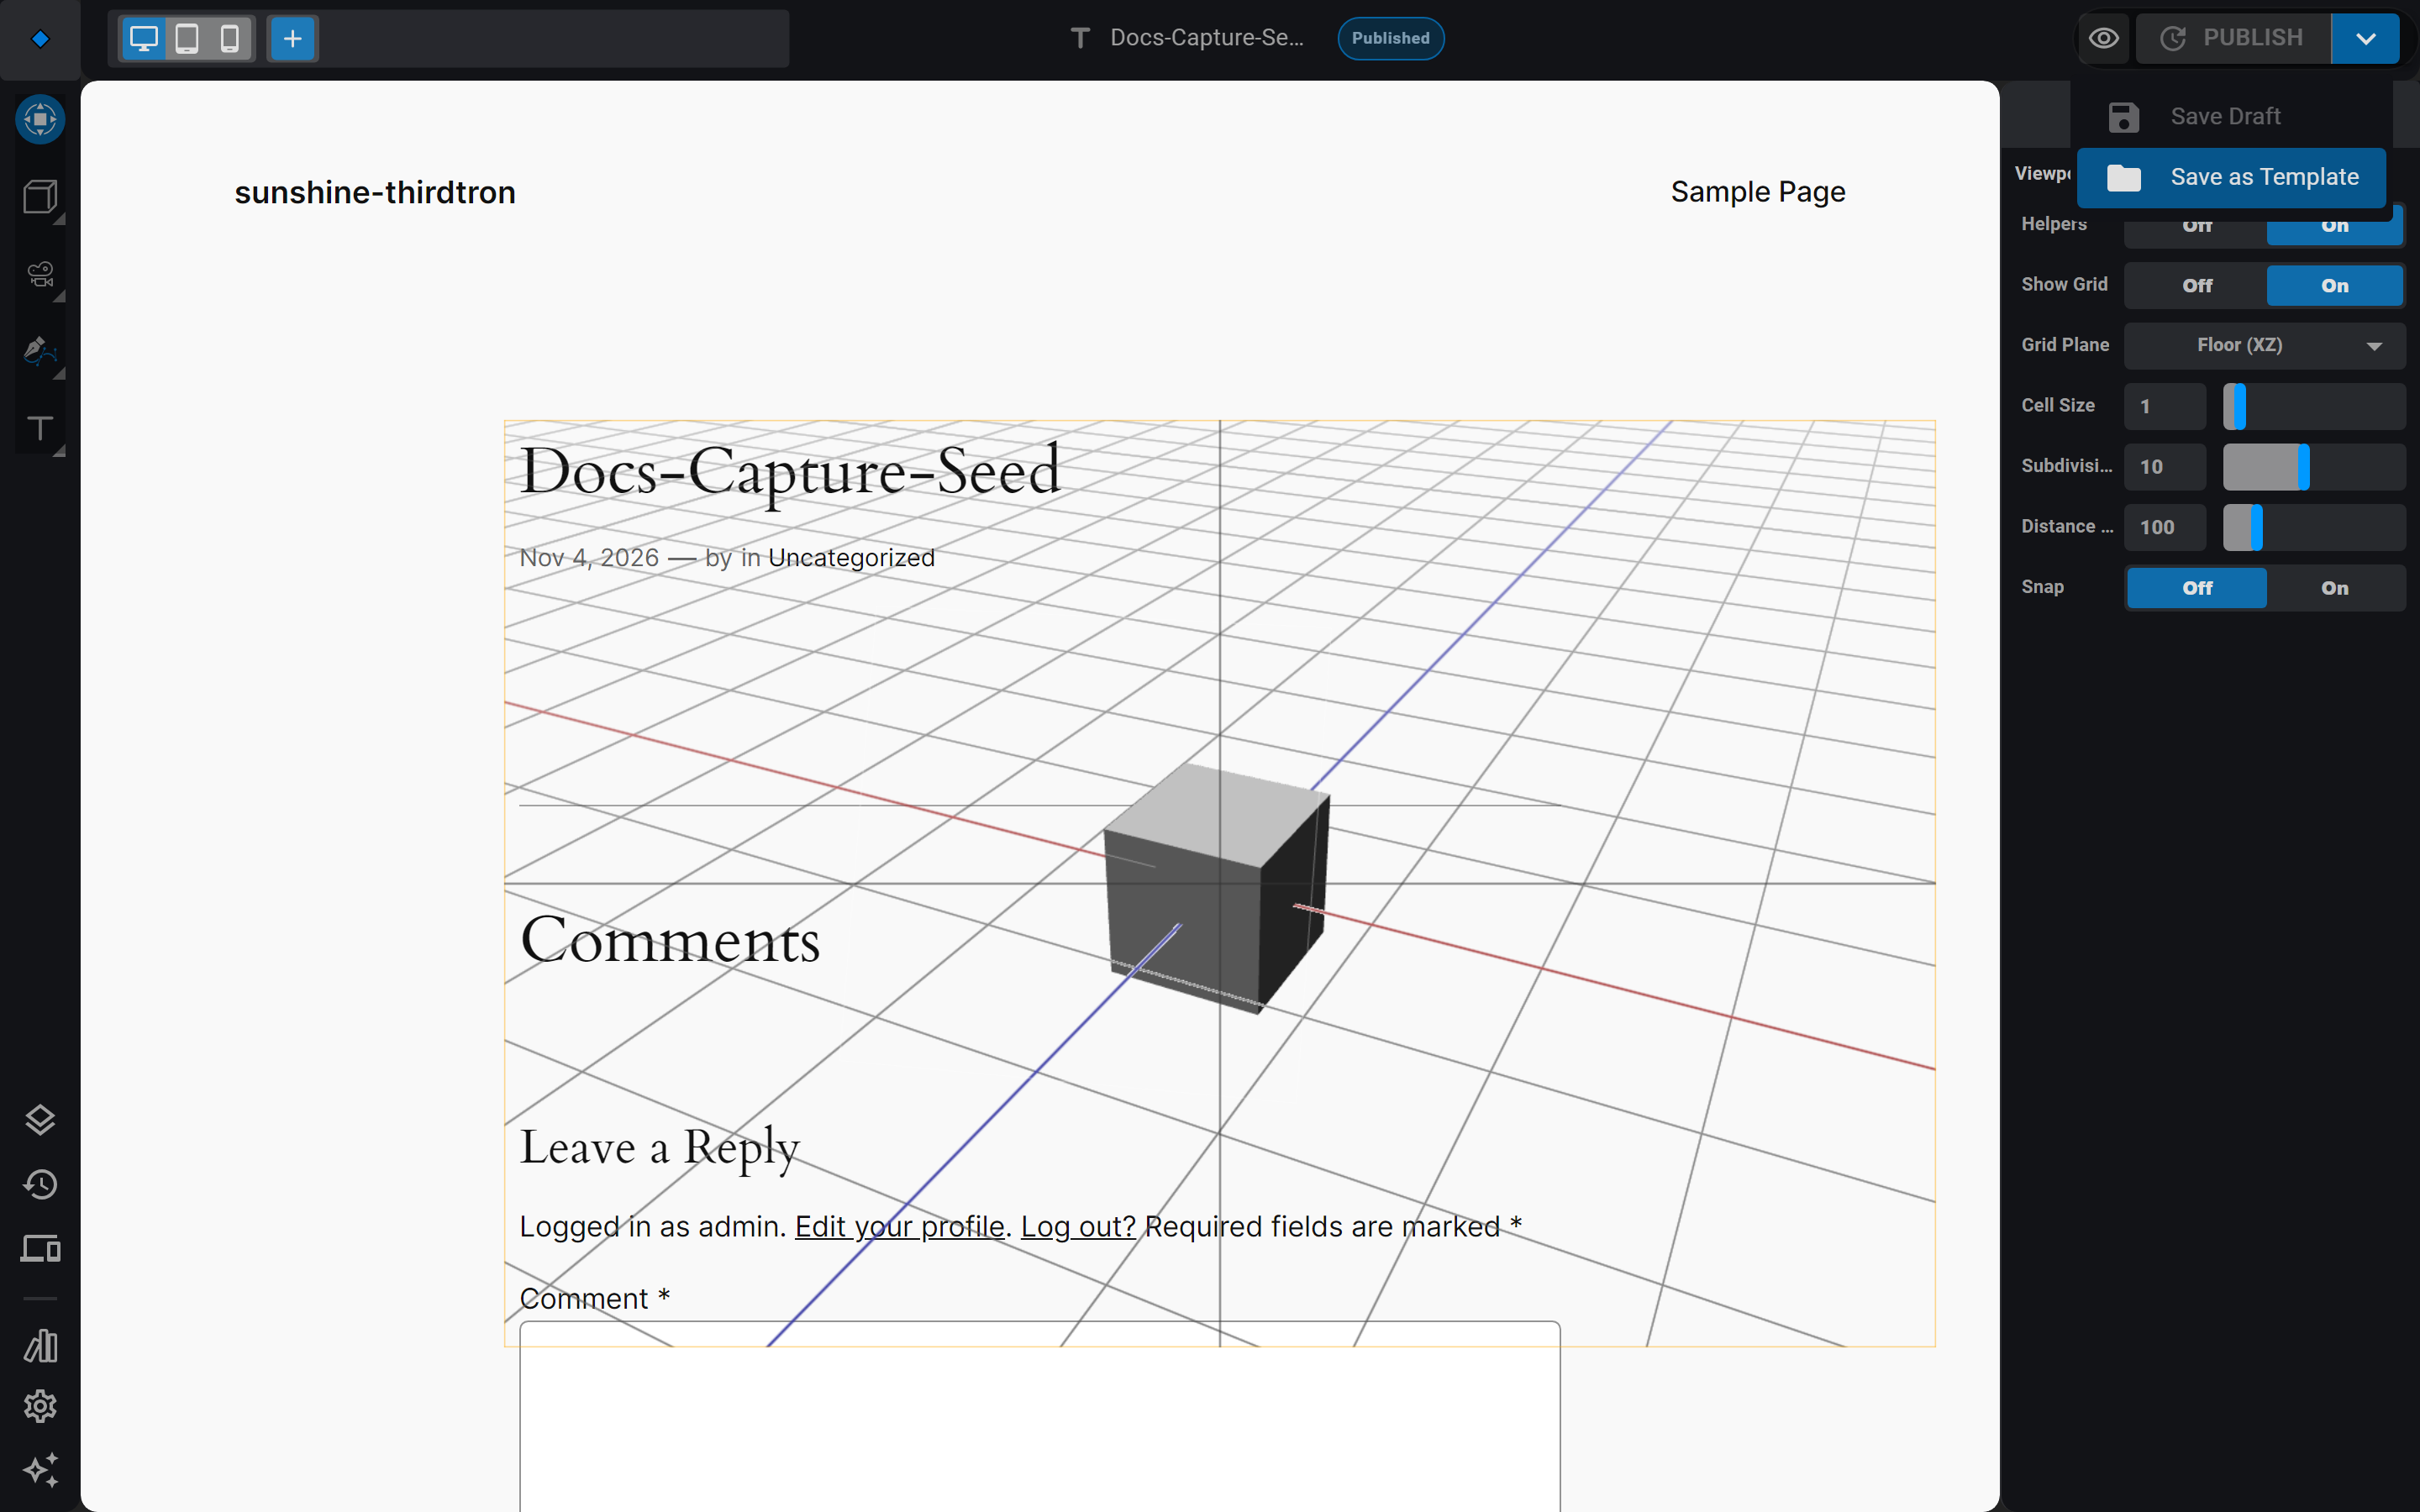
The header's publish button covers the common moments — PUBLISH for a live page, the arrow beside it for Save Draft and Save as Template. The eye icon previews the page exactly as visitors see it. The full walkthrough lives in Quick Start.
Next
- Frontend Behavior — what runs for visitors: events, physics, audio, and cameras.
- Troubleshooting — blank previews and missing scenes, diagnosed.
- Performance Best Practices — keep the published page fast.
Publishing
Ship scenes to the public frontend and keep them fast — shortcodes, frontend behavior, performance budgets, and troubleshooting.
Frontend Behavior
What runs for visitors — events, physics, audio, cameras, and responsive bands on the public page.
Last updated on