3D Objects & Mesh Editing
Add primitive and custom meshes, transform them precisely, then edit them vertex-by-vertex in edit mode.
Everything you see in a Volux scene is an object: meshes, lights, cameras, text, curves. This guide covers the mesh workflow — placing primitives, transforming them precisely, and reshaping their actual geometry in edit mode. When a procedural stack is involved, you can also freeze the whole result into plain geometry.
Place a mesh
- Click Primitives in the left rail to place the category's default (a Box), or right-click it to open the flyout. The flyout groups shapes the way you think about them: Mesh (box, sphere, cylinder, cone, capsule), Flat (plane, circle, ring), Curved (torus, torus knot), and Polyhedra (tetrahedron, octahedron, dodecahedron, icosahedron).
- The shape lands at the scene origin and selects itself — its settings panel opens on the right and the tree row appears under the scene in the Structure drawer.
- Non-mesh objects (lights, cameras, HTML overlays) live in the Objects flyout; text and curves have their own rail categories.
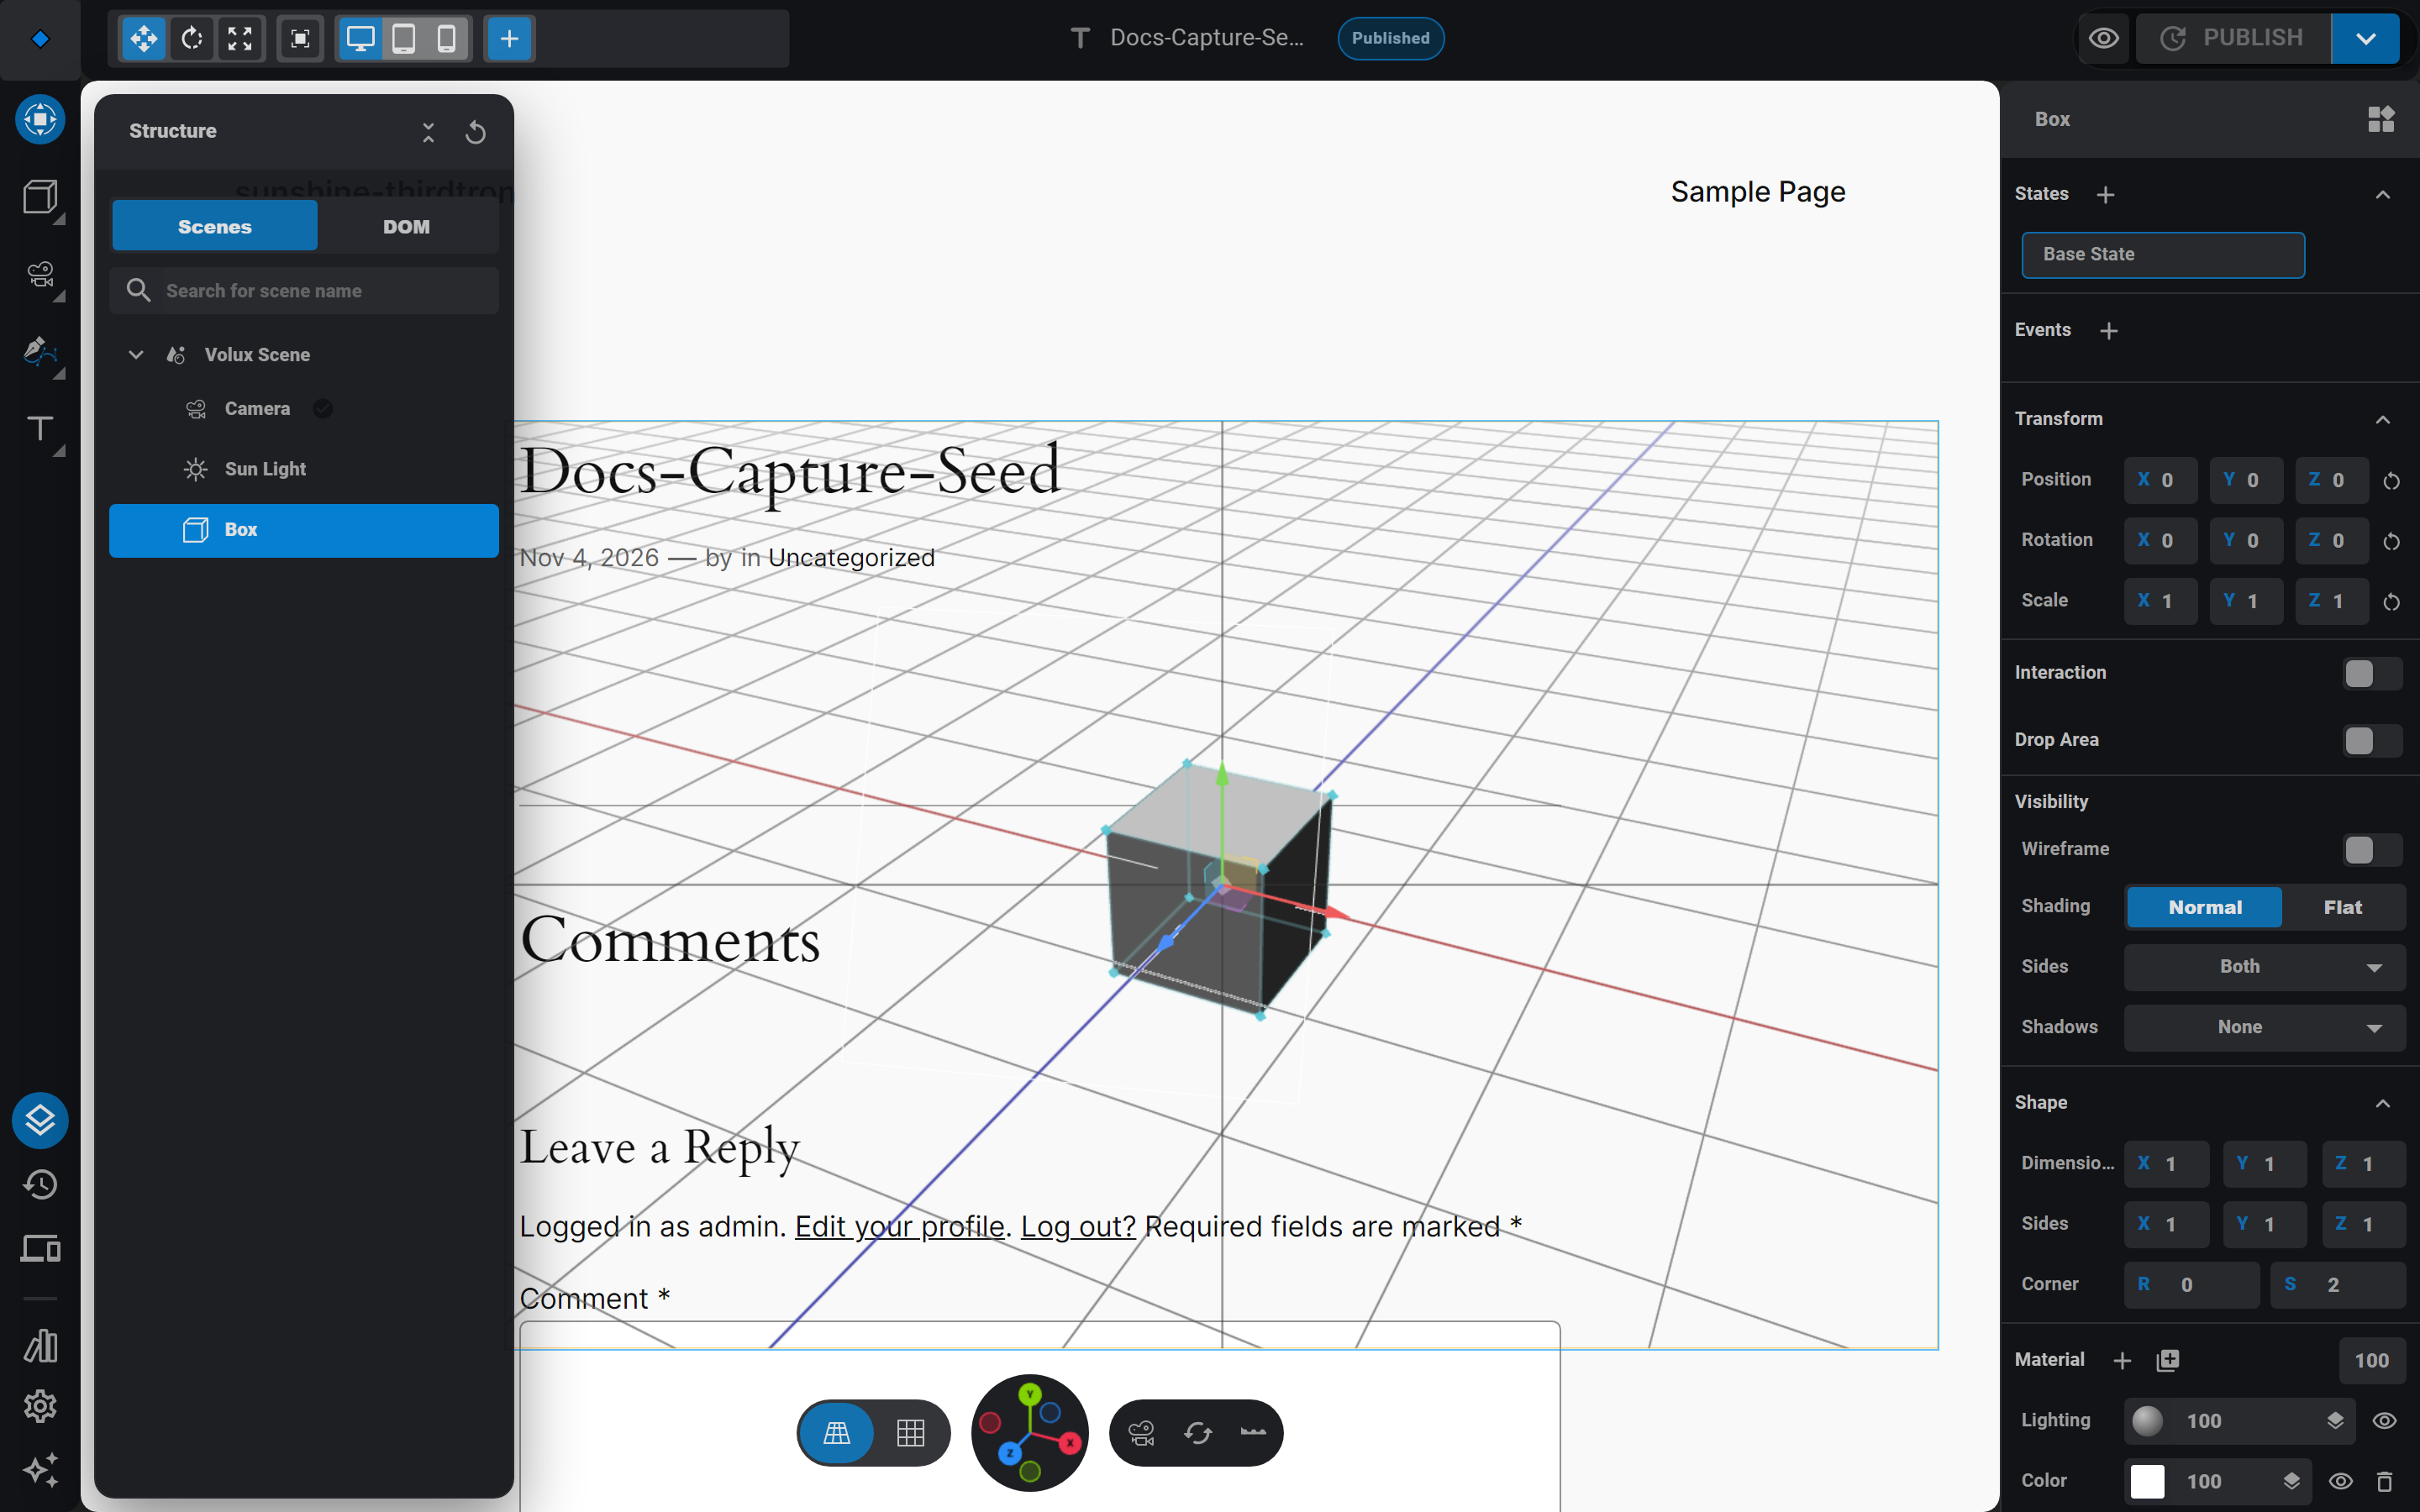
Transform with the gizmo and the panel
- Drag the gizmo arrows to move, the rings to rotate, and the box handles to scale. Each drag is one undo step.
- For exact values, edit Position / Rotation / Scale in the Transform section of the right panel — rotation reads in degrees.
- On the viewport, press G, R, or S to grab, rotate, or scale with the mouse; X, Y, Z constrain the gesture to an axis (Shift+X excludes one), and Enter confirms or Escape cancels. Alt+G / Alt+R / Alt+S reset the transform.
Resize handles respect the object
Flat shapes and text carry their own frame handles — dragging those sizes the shape's frame, not its transform scale. See Text & Curves.
Enter edit mode
Edit mode operates on the object's actual geometry — vertices, edges, and faces — instead of its transform. Only mesh objects can enter it: unconverted text and curves have dedicated sessions of their own.
- Select a mesh and press Tab (or exit with Tab again — a dirty edit commits as it exits).
- Choose what you select with 1, 2, 3 — vertices, edges, or faces. Click a component to select it; overlays draw the wireframe, the selected elements, and the faces.
- The three mesh ops arm with a key and finish with Enter (or Escape to cancel): E extrudes the selection along its normal, B bevels corners into chamfers, I insets a face. While an op is live, an options panel exposes its parameters — distance, width, segments, profile, and friends — and you can keep tweaking them before confirming.
- Commit the session with Tab. The baked geometry lands on the object as one undo step.
Edit mode is a session, not a mode toggle on the data
While the session is open your edits live in a separate mesh store; the document only changes when you commit. Closing the editor mid-session loses only the uncommitted edit — the document itself was never touched.
Stack modifiers on top
Modifiers are persistent, non-destructive operations that re-evaluate on top of the base mesh: Subdivision (smoothing), Simplify (decimation), and Cloner (arrayed copies). Add them from the Modifiers section's add menu, reorder by dragging, and toggle each one's eye to preview with or without it.
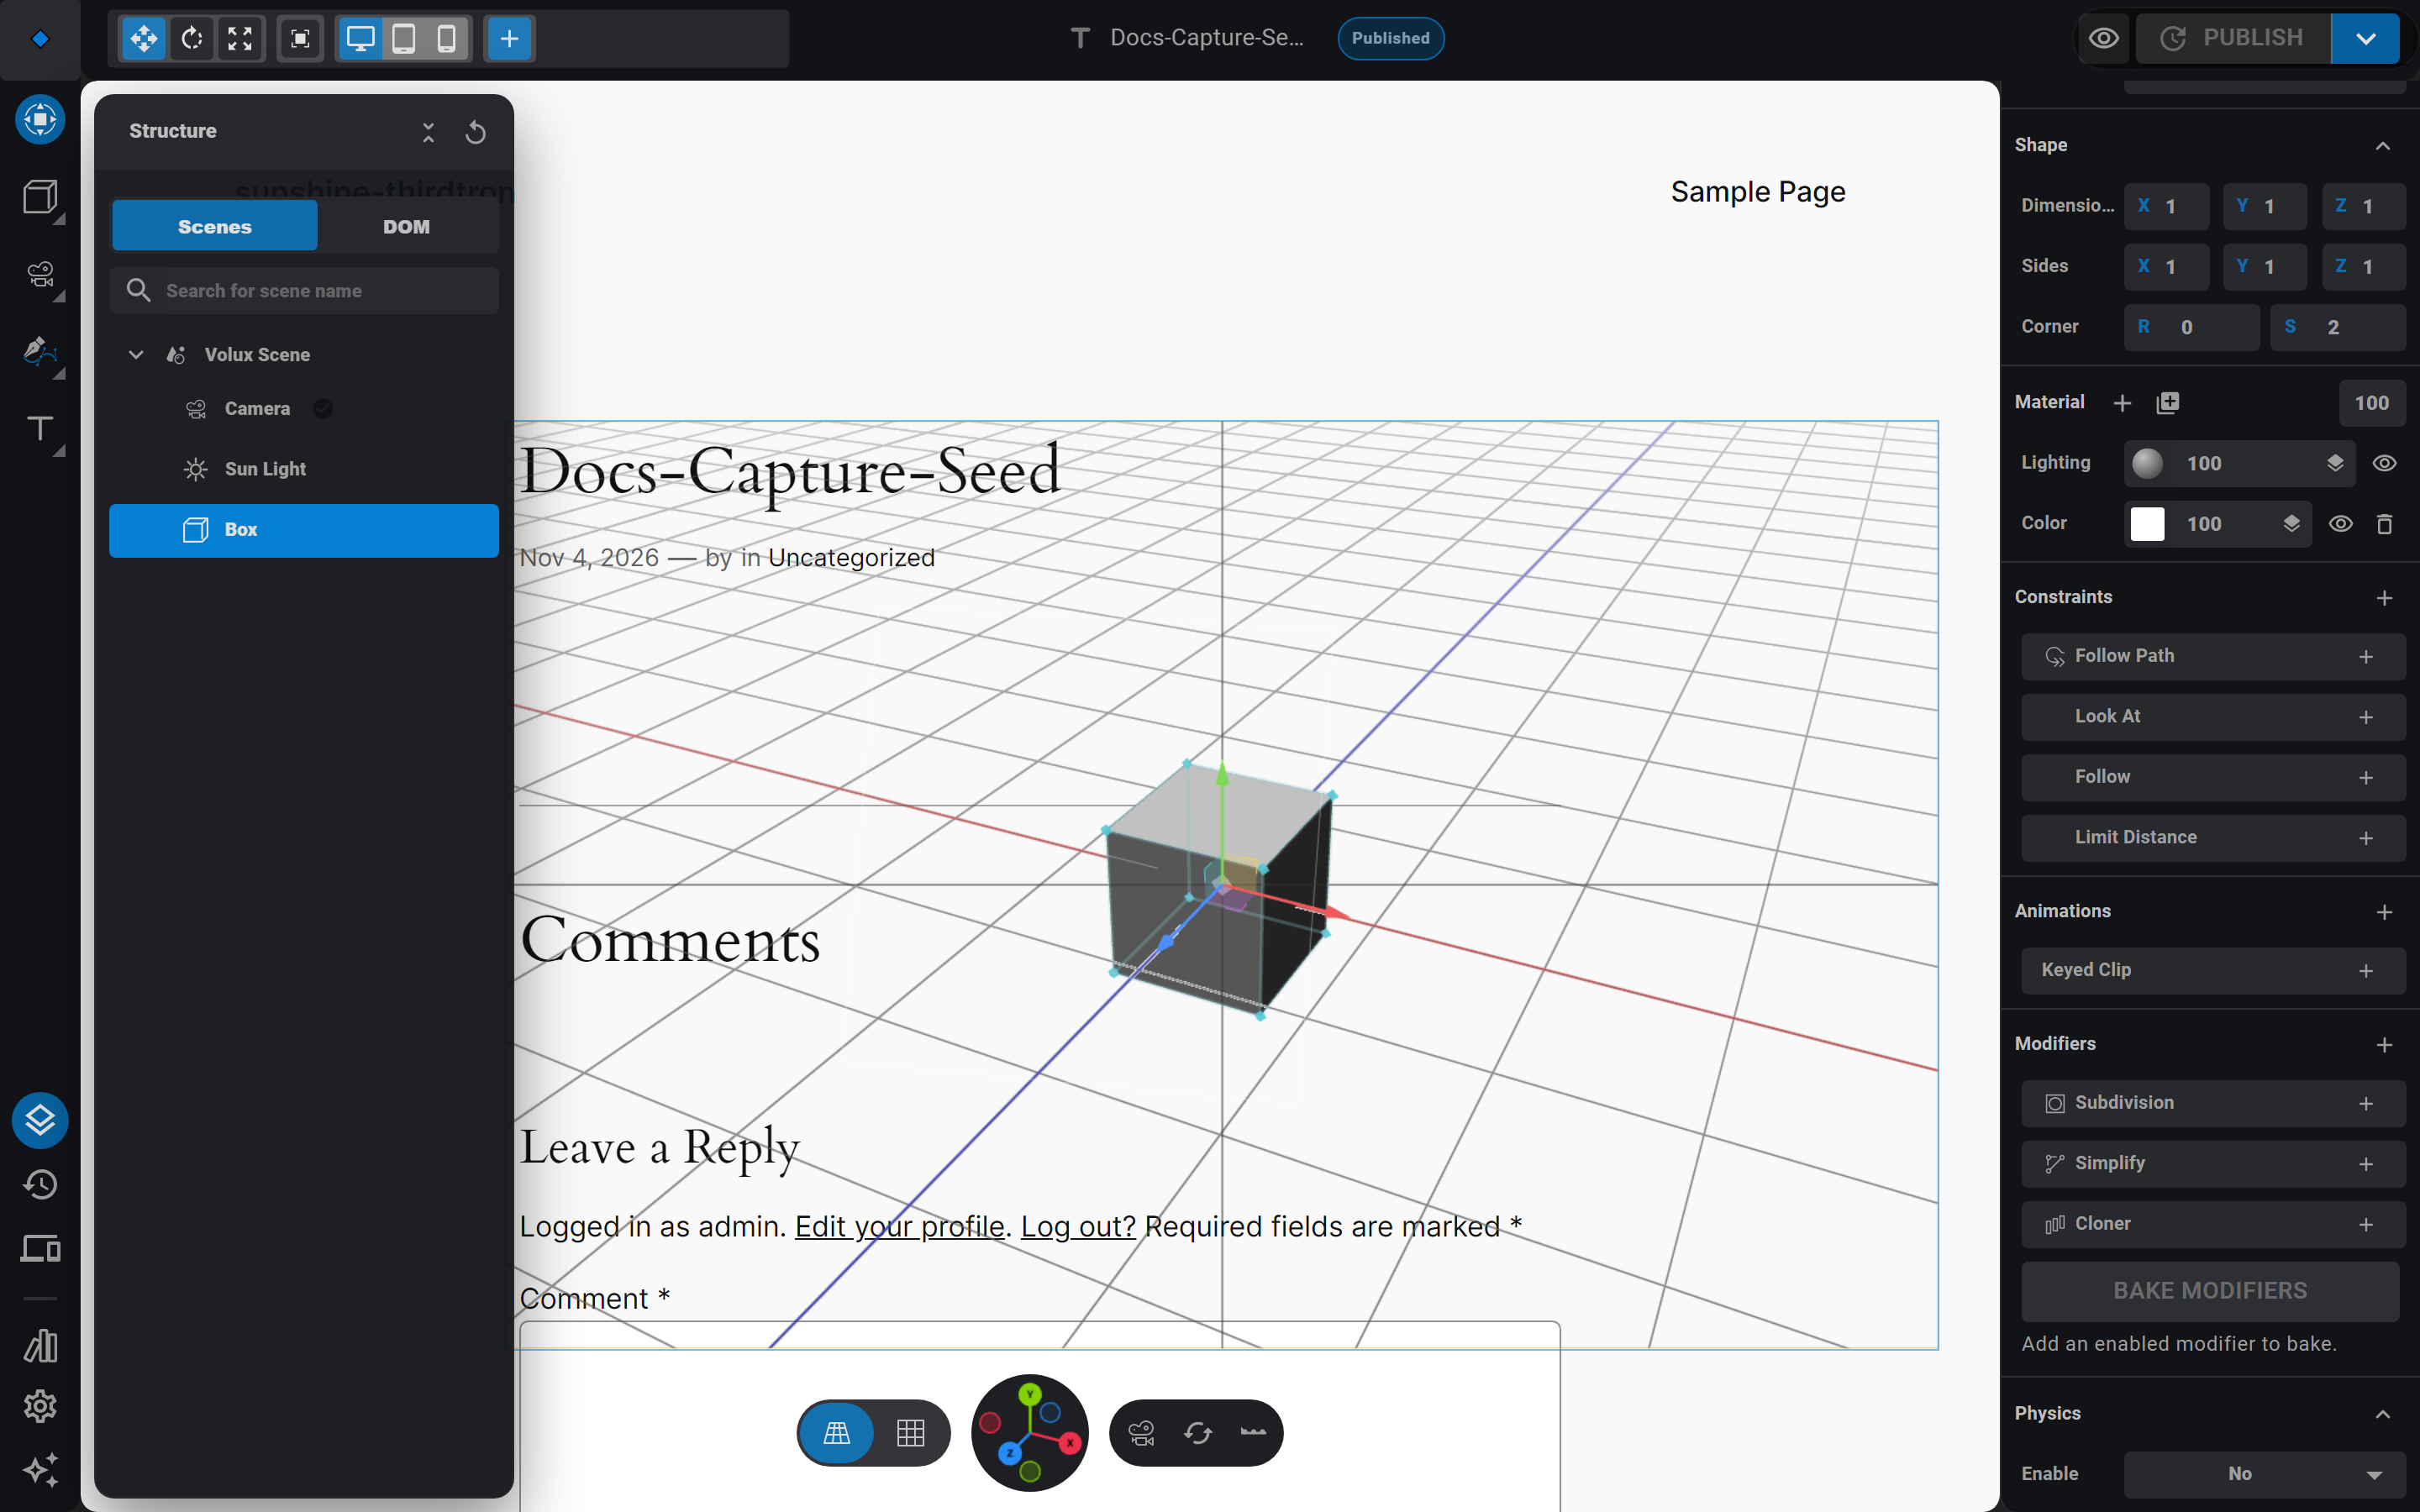
The relationship between edit mode and modifiers is Blender's dual presentation:
- Edit mode edits the base mesh. With enabled modifiers, the session shows the evaluated result as the solid and the base as a ghost under the wires — you always see what the stack will produce.
- Object mode re-renders the identical evaluated result, so what you shaped is what you keep.
- To freeze the stack into plain geometry, click Bake modifiers at the bottom of the section. Every breakpoint of the object bakes in the same undo step and the stack clears — iteration just means adding new modifiers on the baked result.
- Per-breakpoint rows carry a Bake this breakpoint action that re-freezes a single device band when the bands need different silhouettes.
Bake is all-or-nothing
Baking clears the whole modifier stack — on every band — in the same undo step that lands the geometry. One undo restores both.
Next
- Modifiers & Constraints — the conceptual model behind the stack.
- Materials & Texturing — surface the edited mesh.
- Timeline & Keyframes — put the object in motion.
Feature Guides
Task-oriented guides for materials, events, physics, particles, and the other editor subsystems.
Materials & Texturing
Build layered materials, texture them with PBR maps, and reuse the results from your asset library.
Last updated on